p2-insta4288-serverside
Flask Tutorial
This tutorial will help you set up a “hello world” Flask application in a Python virtual environment using a modular approach. The app will have a database, and shell scripts for maintenance.
Prerequisites
This tutorial assumes that you have already created a project folder (i.e., /home/kleach/src/cs4288/p2-insta4288-serverside in the example below). Your folder location might be different.
$ pwd
/home/kleach/src/cs4288/p2-insta4288-serverside
You have created a Python virtual environment and activated it (instructions). You paths may be different.
$ source env/bin/activate
$ echo $VIRTUAL_ENV
/home/kleach/src/cs4288/p2-insta4288-serverside/env
$ which python
/home/kleach/src/cs4288/p2-insta4288-serverside/env/bin/python
$ which pip
/home/kleach/src/cs4288/p2-insta4288-serverside/env/bin/pip
You have completed the SQLite Tutorial. Your version might be different. Your exact database output may be different.
$ sqlite3 --version
3.29.0 2019-07-10 17:32:03 fc82b73eaac8b36950e527f12c4b5dc1e147e6f4ad2217ae43ad82882a88bfa6
$ sqlite3 var/insta4288.sqlite3 "SELECT * FROM users;"
username    fullname
----------  -------------
awdeorio      Andrew DeOrio
Python package
Our Python app will live in a Python package, insta4288.
$ pwd
/home/kleach/src/cs4288/p2-insta4288-serverside
$ mkdir insta4288
A Python package is a directory containing an __init__.py file. Here’s insta4288/__init__.py:
"""Insta4288 package initializer."""
import flask

# app is a single object used by all the code modules in this package
app = flask.Flask(__name__)  # pylint: disable=invalid-name

# Read settings from config module (insta4288/config.py)
app.config.from_object('insta4288.config')

# Overlay settings read from a Python file whose path is set in the environment
# variable INSTA4288_SETTINGS. Setting this environment variable is optional.
# Docs: http://flask.pocoo.org/docs/latest/config/
#
# EXAMPLE:
# $ export INSTA4288_SETTINGS=secret_key_config.py
app.config.from_envvar('INSTA4288_SETTINGS', silent=True)

# Tell our app about views and model.  This is dangerously close to a
# circular import, which is naughty, but Flask was designed that way.
# (Reference http://flask.pocoo.org/docs/patterns/packages/)  We're
# going to tell pylint and pycodestyle to ignore this coding style violation.
import insta4288.views  # noqa: E402  pylint: disable=wrong-import-position
import insta4288.model  # noqa: E402  pylint: disable=wrong-import-position
Config
Next, put app configuration variables in insta4288/config.py. More about configuration in the flask config docs. Hint: use string literal concatenation to avoid lines that are too long.
"""Insta4288 development configuration."""

import pathlib

# Root of this application, useful if it doesn't occupy an entire domain
APPLICATION_ROOT = '/'

# Secret key for encrypting cookies
SECRET_KEY = b'FIXME SET WITH: $ python3 -c "import os; print(os.urandom(24))" '
SESSION_COOKIE_NAME = 'login'

# File Upload to var/uploads/
INSTA4288_ROOT = pathlib.Path(__file__).resolve().parent.parent
UPLOAD_FOLDER = INSTA4288_ROOT/'var'/'uploads'
ALLOWED_EXTENSIONS = set(['png', 'jpg', 'jpeg', 'gif'])
MAX_CONTENT_LENGTH = 16 * 1024 * 1024

# Database file is var/insta4288.sqlite3
DATABASE_FILENAME = INSTA4288_ROOT/'var'/'insta4288.sqlite3'
Change the SECRET_KEY in config.py that is used to encrypt session cookies. You can generate one like this:
$ python3 -c 'import os; print(os.urandom(24))'
Model
The database connection code will live in insta4288/model.py. For now, we’ll just create an empty placeholder file. Later, in the Database connection section, we’ll add code.
$ pwd
/home/kleach/src/cs4288/p2-insta4288-serverside
$ touch insta4288/model.py
Templates
Next, we’ll start working on the insta4288/static/ directory. Add any CSS style sheets and optional images, like a logo.
$ tree insta4288/static/
insta4288/static/
├── css
│   └── style.css
└── images
    └── logo.png
Next we’ll add templates to, insta4288/templates/. In CS 4288 project 2, you can reuse the templates from project 1 as a starting point. For now, we’re going to create a “hello world” template, insta4288/templates/index.html:
<!DOCTYPE html>
<html lang="en">
Hello world!
</html>
Views
Next we’ll create a views module. This Python module contains functions that are executed when a user visits a URL. Most functions render a template and return the resulting HTML formatted text. Later, you’ll access the database, adding data to the context variable. Here’s a start to insta4288/views/index.py
"""
Insta4288 index (main) view.

URLs include:
/
"""
import flask
import insta4288


@insta4288.app.route('/')
def show_index():
    """Display / route."""
    context = {}
    return flask.render_template("index.html", **context)
To make views a proper Python package, it needs a insta4288/views/__init__.py file.
"""Views, one for each Insta4288 page."""
from insta4288.views.index import show_index
Install
We’re getting close to being able to run our app. We need to install our app into our virtual environment so that flask can find the Python packages. Use the pyproject.toml from the starter files, which will look something like this example. Your versions might be different.
[build-system]
requires = ["setuptools>=64.0.0", "wheel"]
build-backend = "setuptools.build_meta"

[project]
name = "insta4288"
version = "1.0.0"
dependencies = [
    "arrow",
    "bs4",
    "Flask",
    "html5validator",
    "pycodestyle",
    "pydocstyle",
    "pylint",
    "pytest",
    "pytest-mock",
    "requests",
]
requires-python = ">=3.12"

[tool.setuptools]
packages = ["insta4288"]

[tool.pylint."messages control"]
disable = ["cyclic-import"]
You should already have a virtual environment installed from the Python virtual environment section. Make sure it’s activated, then install the app into the virtual environment. You may have already installed the packages in requirements.txt.
$ source env/bin/activate
$ which pip
/home/kleach/src/cs4288/p2-insta4288-serverside/env/bin/pip
$ pip install -r requirements.txt
$ pip install -e .
...
Successfully installed ... insta4288 ...
Run
We’re finally ready to run our app! We’ll use environment variables to put the development server in debug mode, specify the name of our app’s python module and locate an additional config file. These commands assume you’re using the bash shell.
$ flask --app insta4288 --debug run --host 0.0.0.0 --port 8000
 * Serving Flask app "insta4288"
 * Forcing debug mode on
 * Running on http://127.0.0.1:8000/ (Press CTRL+C to quit)
Browse to http://localhost:8000/ and you’ll see your “hello world” app.
Summary
At this point, we’ve create a Python module called insta4288. The module is a directory containing Python source code. Here are the files you should have at this point:
$ tree insta4288 -I '__pycache__'
insta4288
├── __init__.py
├── config.py
├── model.py
├── static
│   ├── css
│   │   └── style.css
│   └── images
│       └── logo.png
├── templates
│   └── index.html
└── views
    ├── __init__.py
    └── index.py
$ ls pyproject.toml
pyproject.toml
Run Script
Write script called bin/insta4288run that runs the development server.
If var/insta4288.sqlite3 does not exist, print an error and exit non-zero.
$ ./bin/insta4288run
Error: can't find database var/insta4288.sqlite3
Try: ./bin/insta4288db create
Run the development server on port 8000.
$ ./bin/insta4288run
+ flask --app insta4288 --debug run --host 0.0.0.0 --port 8000
...
Remember to check for shell script pitfalls.
Database connection
In this section, we will create a module that provides database connection helper functions. Later, we will use these functions from our views code.
First, make sure you’ve completed the SQLite Tutorial. You should be able to reset your database and query it.
$ ./bin/insta4288db reset
$ sqlite3 var/insta4288.sqlite3 "SELECT username, fullname FROM users;"
awdeorio|Andrew DeOrio
jflinn|Jason Flinn
michjc|Michael Cafarella
jag|H.V. Jagadish
Model
Add the following code to insta4288/model.py. Notice that it reads the configuration parameter DATABASE_FILENAME from config.py. Also notice that it will automatically commit and close the connection when a request completes.
"""Insta4288 model (database) API."""
import sqlite3
import flask
import insta4288


def dict_factory(cursor, row):
    """Convert database row objects to a dictionary keyed on column name.

    This is useful for building dictionaries which are then used to render a
    template.  Note that this would be inefficient for large queries.
    """
    return {col[0]: row[idx] for idx, col in enumerate(cursor.description)}


def get_db():
    """Open a new database connection.

    Flask docs:
    https://flask.palletsprojects.com/en/1.0.x/appcontext/#storing-data
    """
    if 'sqlite_db' not in flask.g:
        db_filename = insta4288.app.config['DATABASE_FILENAME']
        flask.g.sqlite_db = sqlite3.connect(str(db_filename))
        flask.g.sqlite_db.row_factory = dict_factory

        # Foreign keys have to be enabled per-connection.  This is an sqlite3
        # backwards compatibility thing.
        flask.g.sqlite_db.execute("PRAGMA foreign_keys = ON")

    return flask.g.sqlite_db


@insta4288.app.teardown_appcontext
def close_db(error):
    """Close the database at the end of a request.

    Flask docs:
    https://flask.palletsprojects.com/en/1.0.x/appcontext/#storing-data
    """
    assert error or not error  # Needed to avoid superfluous style error
    sqlite_db = flask.g.pop('sqlite_db', None)
    if sqlite_db is not None:
        sqlite_db.commit()
        sqlite_db.close()
Using the model
In this section, we will modify a view and a template to include information from the database.
View
Edit a view to use the model. Modify insta4288/views/index.py to look like this:
"""
Insta4288 index (main) view.

URLs include:
/
"""
import flask
import insta4288


@insta4288.app.route('/')
def show_index():
    """Display / route."""

    # primer-spec-highlight-start
    # Connect to database
    connection = insta4288.model.get_db()

    # Query database
    logname = "awdeorio"
    cur = connection.execute(
        "SELECT username, fullname "
        "FROM users "
        "WHERE username != ?",
        (logname, )
    )
    users = cur.fetchall()
    # primer-spec-highlight-end

    # Add database info to context
    context = {"users": users}
    return flask.render_template("index.html", **context)
This is as an example of a Python SQLite prepared statement
Template
Edit the template insta4288/templates/index.html to print the users excluding awdeorio.
<!DOCTYPE html>
<html lang="en">
<!-- primer-spec-highlight-start -->
<body>
  <h1>Users</h1>
  {% for user in users %}
  <p>{{user.username}} {{user.fullname}}</p>
  {% endfor %}
</body>
<!-- primer-spec-highlight-end -->
</html>
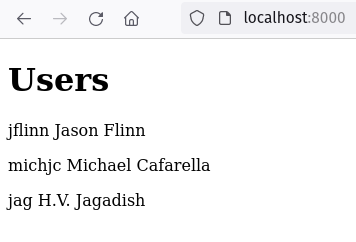
Run
Run your dev server and browse to http://localhost:8000.
$ ./bin/insta4288run
Alternative: the hard way.
$ flask --app insta4288 --debug run --host 0.0.0.0 --port 8000
You should see the contents from the database displayed like this:
REST API
This section is intended for CS 4288 project 3. Skip this section if you’re working on project 2.
Make sure you have an insta4288 directory with an __init__.py and config.py. You can copy __init__.py from here, and config.py from here. You may have different static files, templates, or views. You don’t need any static files, templates, or views for this tutorial.
$ tree insta4288 -I '__pycache__'
insta4288
├── __init__.py
├── config.py
├── model.py
├── static
│   ├── css
│   │   └── style.css
│   └── images
│       └── logo.png
├── templates
│   └── index.html
└── views
    ├── __init__.py
    ...
    └── index.py
Use pip to install the the insta4288/ package.
$ pip install -e .
Create a Python module for the API.
$ mkdir insta4288/api/
Add insta4288/api/__init__.py:
"""Insta4288 REST API."""

from insta4288.api.posts import get_post
Add insta4288/api/posts.py. This sample is hard coded.
"""REST API for posts."""
import flask
import insta4288


@insta4288.app.route('/api/v1/posts/<int:postid_url_slug>/')
def get_post(postid_url_slug):
    """Return post on postid.

    Example:
    {
      "created": "2017-09-28 04:33:28",
      "imgUrl": "/uploads/122a7d27ca1d7420a1072f695d9290fad4501a41.jpg",
      "owner": "awdeorio",
      "ownerImgUrl": "/uploads/e1a7c5c32973862ee15173b0259e3efdb6a391af.jpg",
      "ownerShowUrl": "/users/awdeorio/",
      "postShowUrl": "/posts/1/",
      "postid": 1,
      "url": "/api/v1/posts/1/"
    }
    """
    context = {
        "created": "2017-09-28 04:33:28",
        "imgUrl": "/uploads/122a7d27ca1d7420a1072f695d9290fad4501a41.jpg",
        "owner": "awdeorio",
        "ownerImgUrl": "/uploads/e1a7c5c32973862ee15173b0259e3efdb6a391af.jpg",
        "ownerShowUrl": "/users/awdeorio/",
        "postShowUrl": f"/posts/{postid_url_slug}/",
        "postid": postid_url_slug,
        "url": flask.request.path,
    }
    return flask.jsonify(**context)
Tell the insta4288 module that it now has one more sub-module. Add one line to insta4288/__init__.py. It’s the line with import insta4288.api.
...
# primer-spec-highlight-start
import insta4288.api  # noqa: E402  pylint: disable=wrong-import-position
# primer-spec-highlight-end
import insta4288.views  # noqa: E402  pylint: disable=wrong-import-position
import insta4288.model  # noqa: E402  pylint: disable=wrong-import-position
Now, your files should look like this:
$ tree insta4288 -I '__pycache__'
insta4288
├── __init__.py
├── api
│   ├── __init__.py
│   └── posts.py
├── config.py
Test your REST API.
$ flask --app insta4288 --debug run --host 0.0.0.0 --port 8000
You can also use ./bin/insta4288run from project 2.
Navigate to http://localhost:8000/api/v1/posts/1/. You should see this JSON response:
{
  "created": "2017-09-28 04:33:28",
  "imgUrl": "/uploads/122a7d27ca1d7420a1072f695d9290fad4501a41.jpg",
  "owner": "awdeorio",
  "ownerImgUrl": "/uploads/e1a7c5c32973862ee15173b0259e3efdb6a391af.jpg",
  "ownerShowUrl": "/users/awdeorio/",
  "postShowUrl": "/posts/1/",
  "url": "/api/v1/posts/1/"
}
Acknowledgments
Original document written by Andrew DeOrio awdeorio@umich.edu.
This document is licensed under a Creative Commons Attribution-NonCommercial 4.0 License. You’re free to copy and share this document, but not to sell it. You may not share source code provided with this document.